PandaCube: Making of PC-05 Flux
Written by GRX of PandaCube
Hi, I'm GRX from PandaCube and I want to shed some light on the development of the winning PC Demo from Revision 2011. All non work-in-progress screenshots are grabbed from the post-party-release version, which can be downloaded through the 'Final' link on the PC-05 pouet.net entry.
Concept and Design
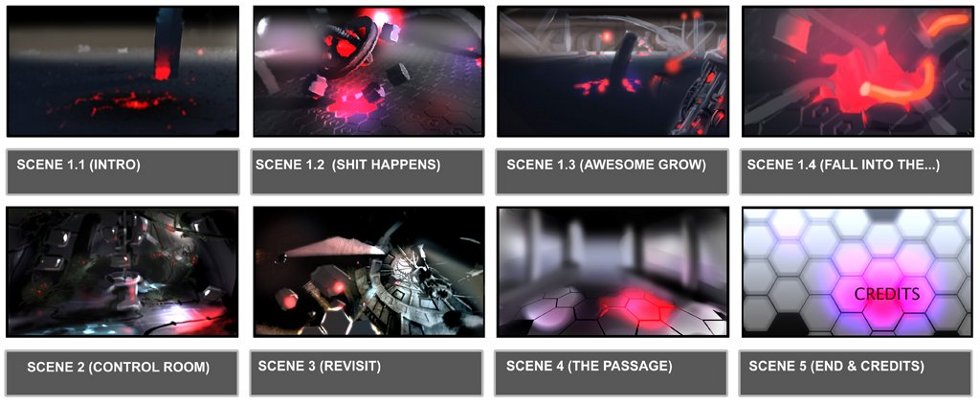
We started with the actual work on the PC-05 demo about 9 weeks before Revision 2011. At that time we were worried that our main Artist (Zonbie) would get swamped with work in his regular day job. We decided therefore that we should make the demo more code driven and systemic vs. the normal quite art heavy style, which we ran with for the previous two demos. In our design process we normally first create a storyboard, which will give a general overview over the scene layout that we plan for the demo.
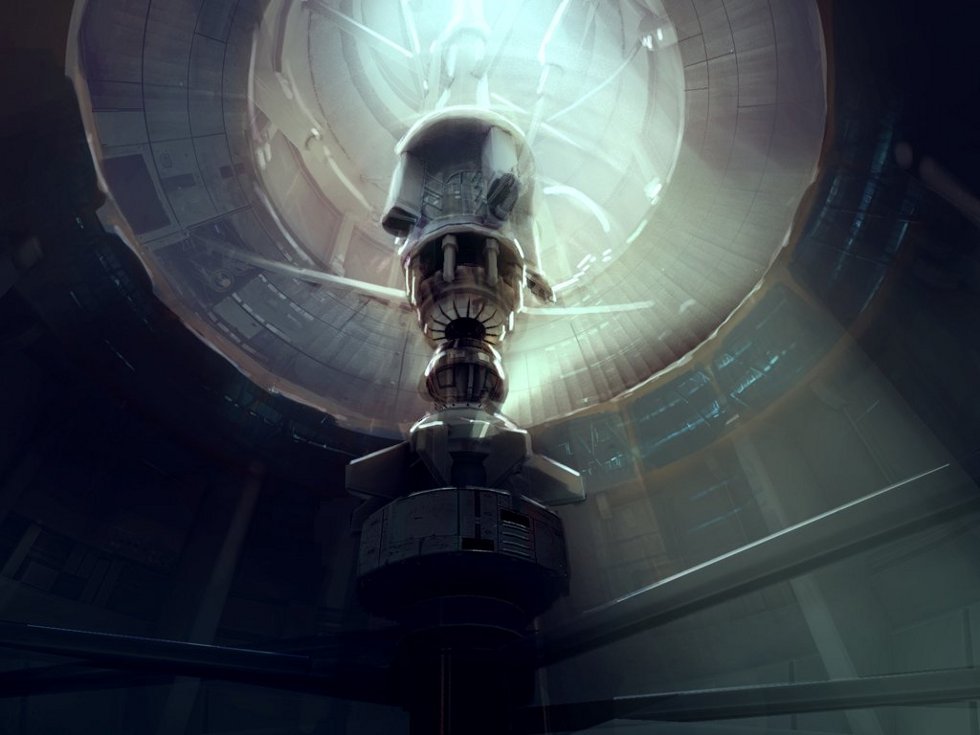
As you can see from the storyboard, we did not really know what to do for the credits scene, but we were not too worried about that at the time. We wanted to incorporate the “re-visit” theme that we deduced from the official invitation demo for Revision (Rumours and Facts by Rebels). For this we added the reactor from our first Demo PC-03 into scene 3. Although you fall through this scene in only 15 seconds, we completely rebuilt the geometry and only kept the original concept. Scene 4 was later dropped because of concerns that we would run out of time (we did run out of time anyways).
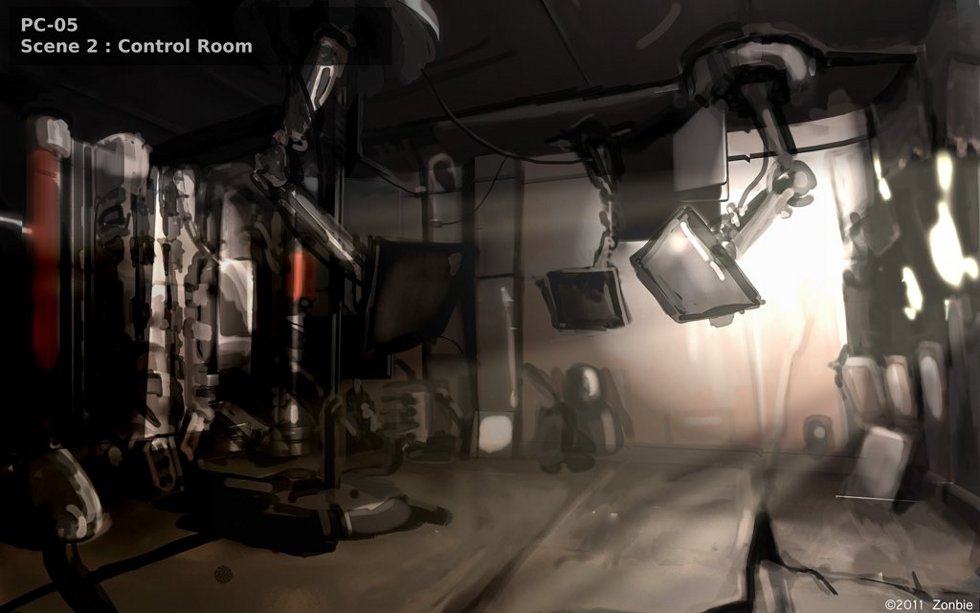
For the two more art heavy scenes that we started to work on first, additional concept art was created. Zonbie painted his vision of the control room and Bianca helped us to find the right mood by making a paint over of a screenshot of the reactor room from the PC-03 Redux demo.
New tech developments
After releasing a demo we always take a look back at the current state of our framework and define the new tech developments that we want to realize for the next year. After the release of PC-04 Partycle we saw a couple of areas where we needed to improve.
With PC-04 we only had the support for loading models using the OBJ file format. This file format is super simple and fast to implement, but only supports one UV set. For the new demo we wanted to implement a blended material system, where two normal materials (diffuse, normal map, specular map) are blended together using a mask texture. We also wanted to use some precalculated lightmaps. For this to work, we needed three UV sets. After looking into a couple of alternatives, we decided to use the Collada file format. It is xml based and relatively easy to read. The downside is clearly the file sizes. Uncompressed xml files are huge! Fortunately, xml files also compress quite well. I decided to write my own file format, which would combine all our small text based configuration files, models and textures and put them into one big data blob. The command line tool that creates these data repositories has the option to flag certain file types for compression (using the zlib library). The new file system would return a chunk of memory for any file that you query from the file manager. As a result, I had to rewrite all the shader, texture, model and music loading code to be able to handle the data already loaded into memory. In our previous demos we only had static geometry or props that we moved on spline paths. The new Collada file format allowed us to implement a limited animation support for rigid body animations.
In our demos we normally play an mp3 file as the music track. This makes synching to the music quite a challenge. To help with this situation, I wrote a small commandline tool that is able to parse midi files. Our musician for PC-04 and PC-05 (Orhanproject) was able to save out a midi file from his authoring software. This allowed me to parse that midi file and calculate the exact timings for each beat (or other note that we want to synch to).
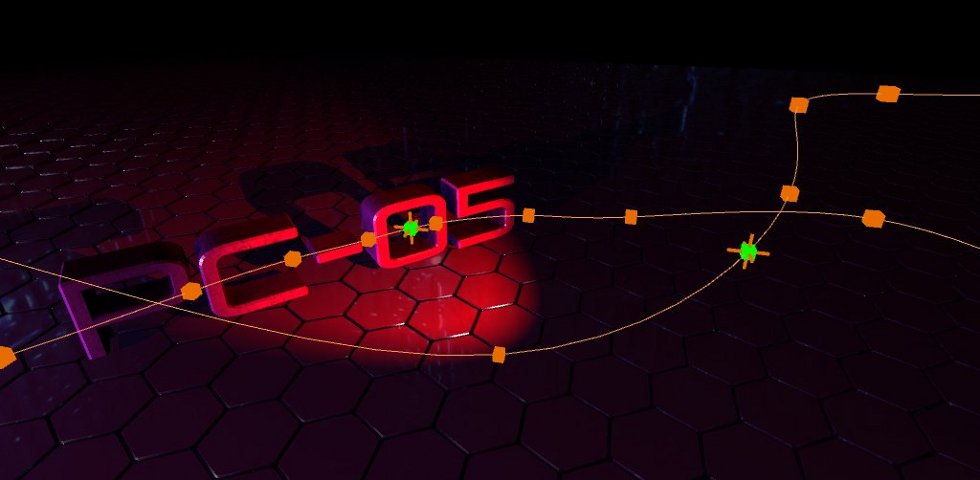
For the PC-05 demo I exposed all our light settings of our spot and omni lights to text configuration files. This allows us to add new lights to any scene, while the framework is running. He can also change any setting (position, orientation, attenuation, color, strength, etc) for our dynamic light sources and reload them on the spot. Position and orientation changes were facilitated by our spline editing tool within the framework. The PandaCube framework is currently using a forward lighting system.
I normally work on the new tech features from time to time, but I normally tend to be quite lazy for most of the year. For this demo only the big file system and the Collada parser was done before we started with the production of PC-05.
Realization
In the first few weeks, I was busy setting up the scenes and implementing the tech features that were not finish during the year. All members of PandaCube have a demanding day job and so only the evenings and weekends are available for working on the demos.
In the following paragraphs, I want to highlight some of the features that we developed for PC-05 and what problems we encountered.
For the first scene (internal name HexGrid) I wanted to render a vast grid of hexagons. Our grid consists of about 7500 hexagons; each is a model of 68 triangles. The straight forward rendering of these hexagons showed dramatic performance problems. The first optimization was to use instancing, but instancing will not solve all your problems here. I started to generate axis aligned bounding boxes for blocks of 7 by 9 hexagons. Each of these blocks would then get culled against the view frustum and rendered in one instancing batch. This improved the performance to acceptable levels, but one problem was still there: from certain viewing directions the frame rate was significantly lower than from other angles. After using the Intel's Graphics Performance Analyzer tools, I figured out that I was running into overdraw problems. Because of the nature of the scene, I found a quite elegant solution: depending on the view angle, I changed the sorting of the 7 by 9 blocks and also of the hexagons within a block. This can be done for almost no cost, by just setting your begin/end/stepping variables for your loops, which create your hexagon blocks.
The height offset for each hexagon was determined by sampling a 2D height field simulation. The simulation differs depending on the part of the HexGrid scene. For most of the scene a simple averaging algorithm was run (each sample point would be averaged with its surrounding 4 direct neighbours; the result would be dampened to remove energy from the simulation). For the UV meter part, a 2D wave simulation was run on the height field. The input for the 2D wave simulation were the center hexagons, which were displaced to the beats of the music. The positions for the data inputs for the first part of simulation were determined by sampling splines. I also attached a red Omni light to each data input position to make it more visually interesting. The height offset for each data input was synched to the beat of the music. Both height field simulations were run on the CPU (we tend to be GPU bound in our demos).
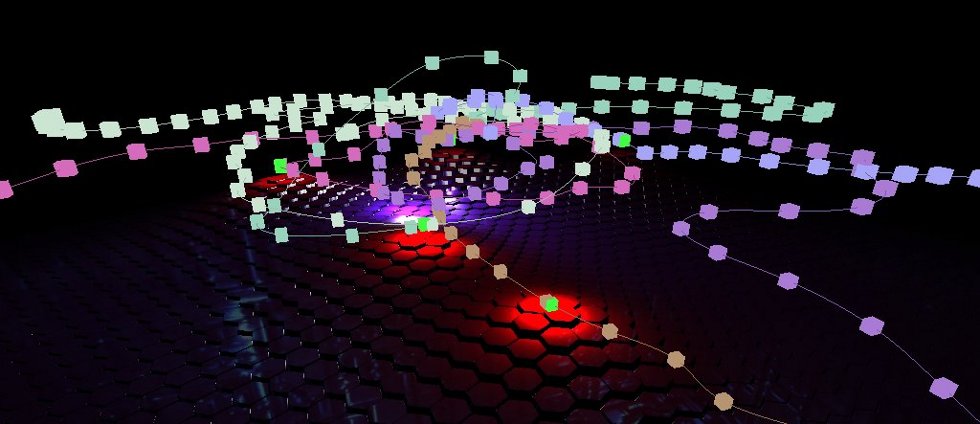
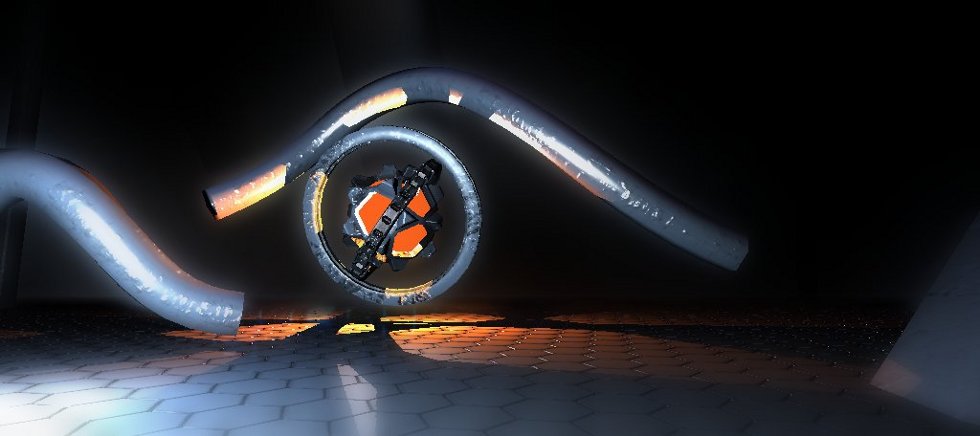
One of the many props that we use in the HexGrid scene is the Torus that runs with 6 dynamic spotlights that are placed in the center of it (one for each axis direction). The Torus was modeled in a way, so that the metallic part was closed geometry. This allows the rendering of the torus to the spot light shadow maps (leaving out the emissive material). Together with the independently rotating rings around it, this results in very interesting shadow patterns on the hexagon grid and surrounding tubes.
The tubes were generated dynamically from splines placed within the scene. UV coordinates are automatically created as well. The hexagon style textured tubes also rendered a head and tail geometry on each end. Each head and tail has one orange Omni light attached to it.

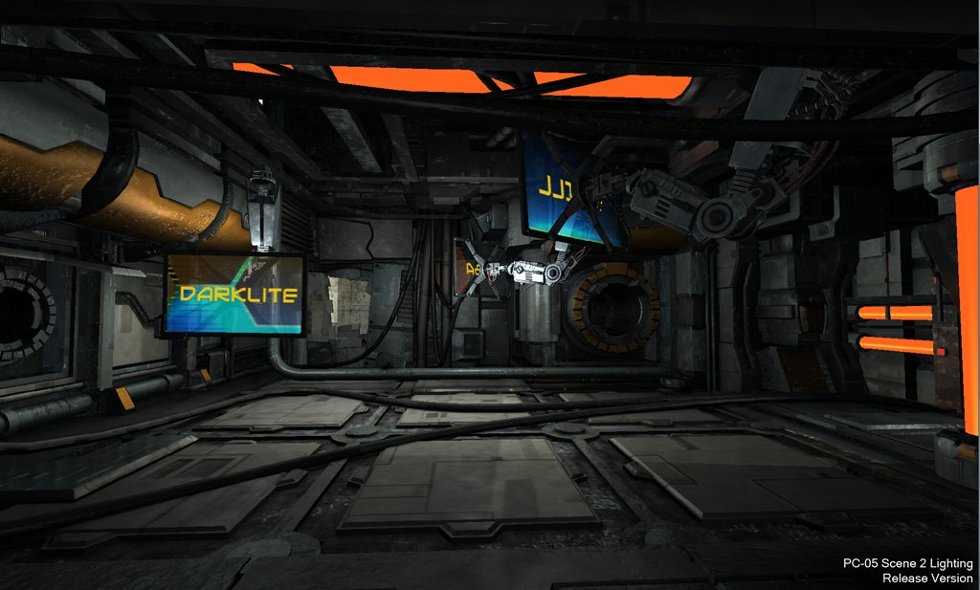
For the second scene of PC-05 (Control Room) we wanted to max out the potential of our new blending material shader. This shader takes two normal materials (diffuse map, normal map, specular map) and blends them using a mask texture. This has the benefit of reduced individual texture sizes but at the same time keeping very nice texture details with little noticeable tiling. We also implemented a second variant of this shader, where the second normal map uses the mask UV set. This allowed Zonbie to create materials that looked like peeled off paint, chips and scratches that cut into the first texture. The downside of using these materials is that you need to set up at least 7 textures per material. We ended up with 161 textures handles for the control room (ShaderResourceViews) that I had to handle in code, as we did not have a systemic material system. This resulted in hugely bloated code for that scene.
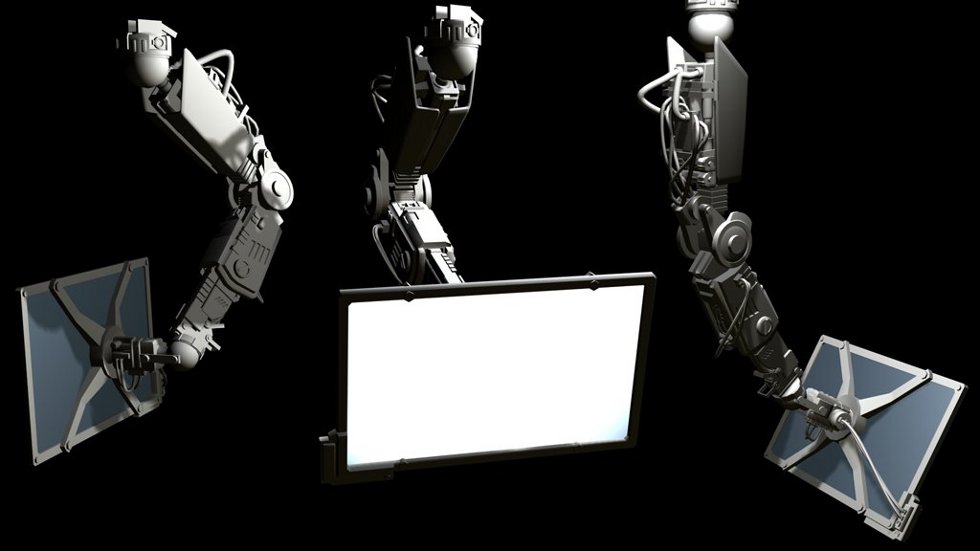
Besides the very detailed room the main attraction of the control room are the animated robotic TV arms. The model was created by Zonbie and animated by Obj.01. For the screen effect we blended together two textures, one for the background and one for the text. The sorting of the alpha blended screen planes was done in code, basically reordering the draw calls when drawing the meshes (only three arms and they were never in any difficult orientation).
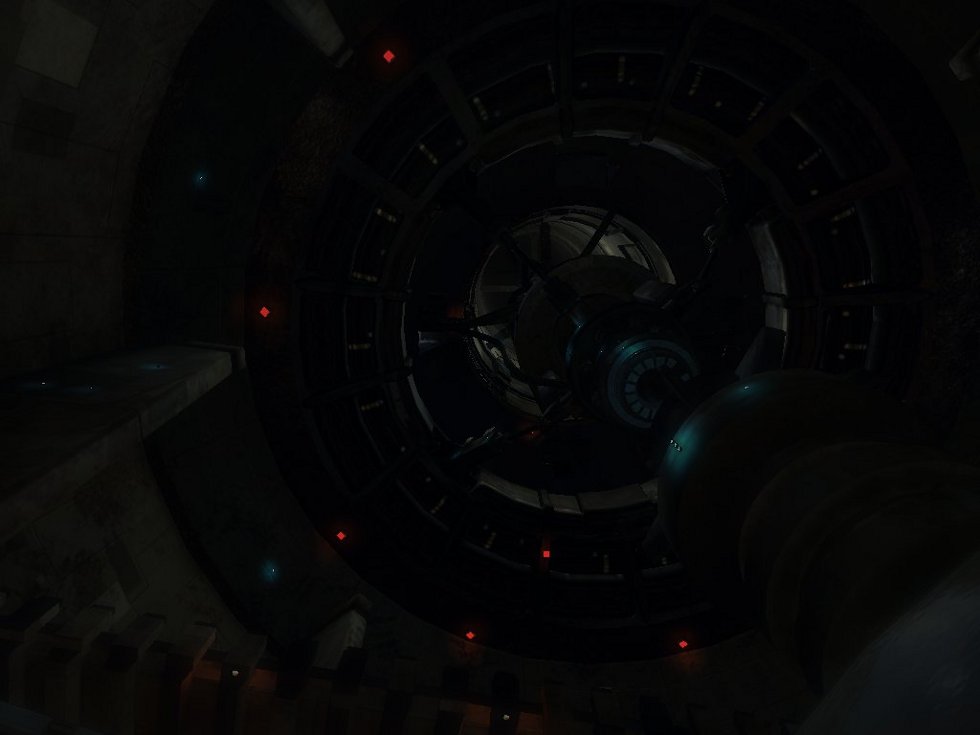
One thing that probably most people did not notice is that we had a scene transition between the control room scene and the fall scene. Right at the moment where the camera looks towards the wall, we switch out both models (the control room with a cheaper version and the cheap fall model of one segment with the complete model). Most of the lighting in the Fall scene is done with a pre-baked RGB lightmap. All of our lightmaps use the alpha channel for pre-baked ambient occlusion. Through the lightmap we were able to create the Illusion that the Fall scene was lit up by 100+ small red and blue lights. For a seamless transition the upper part of the Fall scene had some dynamic lights active.
For the PC-05 demo we ran out of time quite dramatically. At the point where we arrived at the Revision party on the Friday, a lot of features were missing:
- All cameras and splines for the HexGrid scene (including lights, tubes, torus, data inputs)
- The 2D wave simulation for the hexagons
- The blend effect for the TV screen
- The complete Credits scene
- The Final Music track
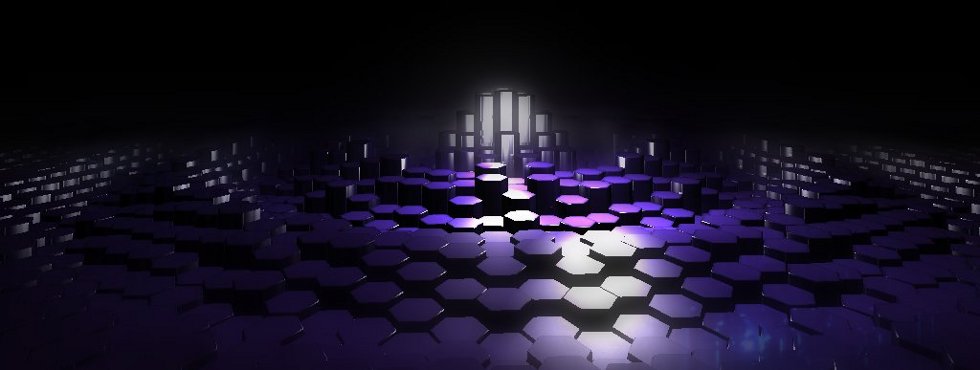
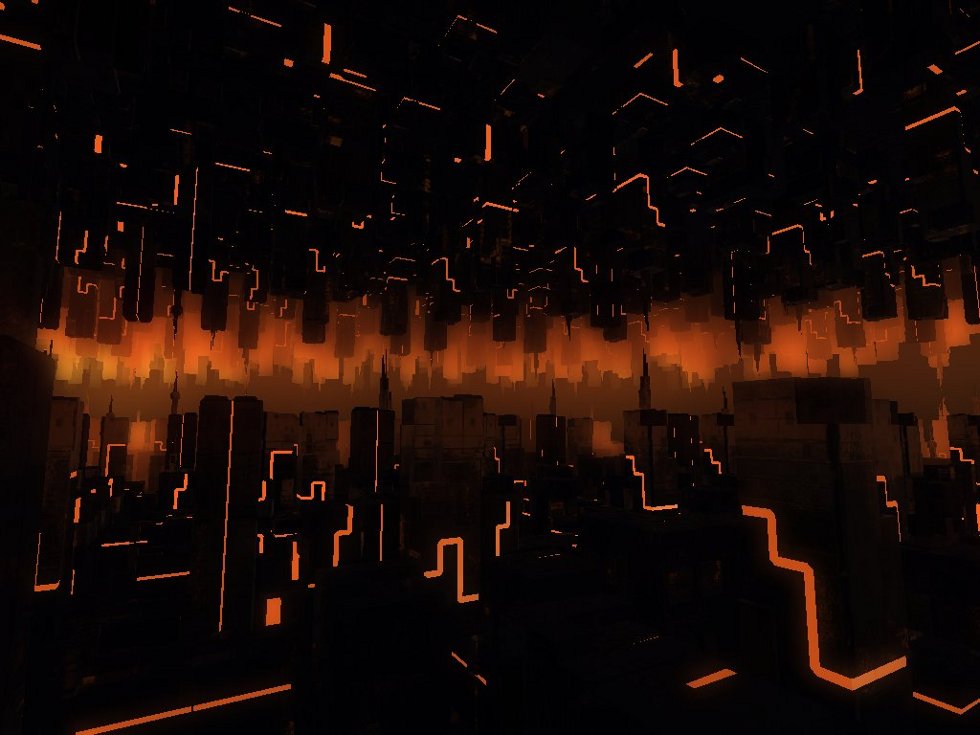
Through frantic hacking we managed to get the above features done, but we basically only had one pass at all of the spline and camera work. For the credits scene, Zonbie build a city block that I placed in two 7x7 grids, forming a ceiling and floor. Each block was rotated by 90° to break up the repetition. To increase the performance each block was culled against the view frustum. Our simple fog implementation was abused to create the orange glow on the city buildings in the distance. Overall the party release lacked massive amounts of polish.
Post-Party-Release Version Improvements
Even though we managed to win the PC Demo compo with PC-05, it did not reach our own quality expectations. That's why we decided to spend another 5 weeks on the PPR release.
We managed to improve the following features:
- General polish on all splines for the HexGrid and Credits Scene.
- Added splines for additional Props in the HexGrid scene (all these
- Props were already in and loaded for the party release, but we never managed to place splines for them)
- Fixed some visual problems with the Depth-of-Field Post Effect
- Changed the lighting color on the second half of the HexGrid scene
- The 2D wave simulation on the hexagons was made frame rate independent
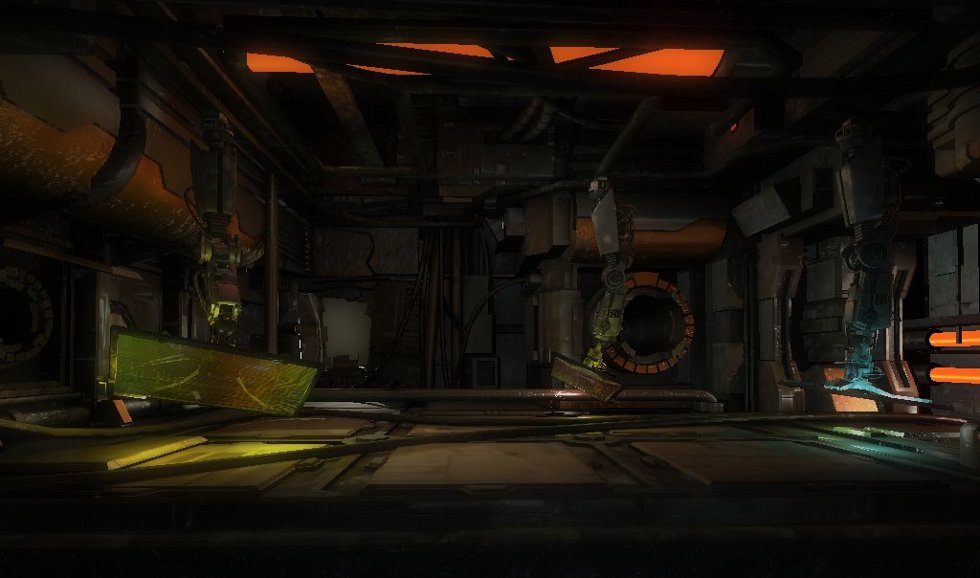
- Changed the lighting for the control room
- Improved the TV effect by adding two dynamic omni lights that take on the color of the screen (this was done by reducing the dynamic screen texture down to two texel and then reading back those color values to the CPU to color the omni lights)
- The strength of the TV omni lights was synched to the music track
- TV screen blending textures were redone and a screen refresh effect was added
- Reduced the final demo file size from 72.4 MB to 50.6 MB
Final Words
Thanks for reading. Take a look at the PPR version of PC-05, if you have not seen it yet. We are currently also working on a new design for our homepage: http://www.pandacube.com
GRX